Saturday, 12 September 2015

Sept 2015: Keel and stem

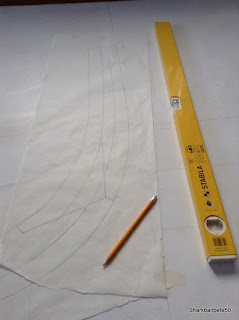
After quite a bit of puzzling (the Riff design is for strip build, and I want to do clinker) the stem was drawn on the lofting boards and decisions made for the stem cuts.

Stem design and profile from Paul Gartsides #136 rowing boat


Lofting board laid on on the dining room floor, using the plastic lid off electrical trunking as a very flexible 'batten' to pick up the sharp curve of the stem.

Riff is drawn for a laminated stem, so I copied the details from Paul Gartside's design for #130 (a 12' rowing boat). One difference is that the rowing boat stem rises very quickly from a flat keel to a vertical prow. The Riff design is a more leisurely rise, perhaps better for changing tack when sailing.

Gartside design #146 for the Swansong sailing boat actually shows a laminated stem, so this is a fallback if I have trouble with the oak stem pieces.

I've bought a section of 100mm x 42 mm x 3600mm American Oak for the keel. this will need to be shaped slightly for the rise at the back of the boat (I'm assuming again to allow smooth changes of tack) and cut down to the dimensions required on the plans.


 The stem design was drawn onto baking paper (works fine as tracing paper!)

Then the lines transferred to the oak blanks by pushing pins through the lines on the paper into the wood underneath.


The pinholes are then joined with a pencil - very accurate.


My cutting out of the (nearly 2" thick) oak was less then accurate (and strangley a long way from square) so some cleanup was required with a handplane (accomplished after some serious sharpening of a new blade). Oak is tough!

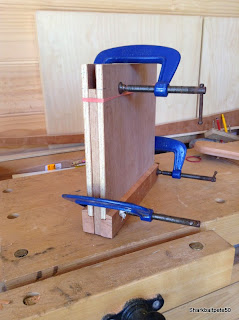
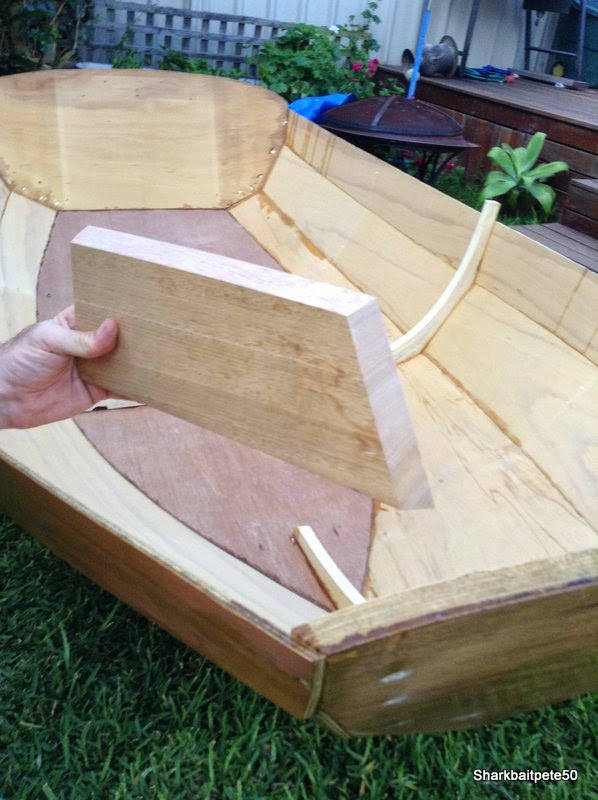
Placing two of the stem pieces together shows where the locking piece is yet to be shaped, and will be held with (silicon bronze) bolts.

Monday, 8 June 2015

June 2015: Paul Gartside's 'Riff' - new build in clinker mahogany

Boat No.2

The 7'7" Nutshell Pram is a lot of fun, but suffers from some drawbacks because of its size:
- being very light, it feels skittish in a breeze
- being short, there is only room for one sailor
- and that is sitting between the middle and rear seats, in the bilge water

So a new build is called for (and building the Nutshell Pram in lapstrake ply was to be practise for a clinker build later).
Paul Gartside has a number of nice looking boats (to an amateur like me) and I've picked design #136 'Riff', a 12' sail design with inbuilt bouyancy, a centre-board, kickup rudder and nice lines. Paul was very responsive to my initial questions for building this boat in clinker rather than the designed stripbuild.


I believe this photo was also in the magazine 'Wooden Boat' Issue 189 (March/April 2006), with a Riff build in three issues 189, 190, 191.  Back issues are available online from the Wooden Boat Store.


Planned materials:
The plan is to loft the design onto a number of 8' x 4' sheets (from Bunnings, undercoated white), and then build from plantation mahogany sourced via Anagote Timbers, Marrickville, Sydney.

The steamed ribs could be silver ashy, or I could try to find white oak. The copper nails and roves, and silicon bronze fittings, are available locally from DriveMarine in Beverly Hills.

The actual hull build may not start till the end of the year.


Lofting practise:
I've been working my way through the lofting designs in two excellent books by Greg Rossell...
'The Boat Builders Apprentice' and 'Building Small Boats'.


I tried to buy a parallel rule (with metal roller underneath) but it was rubbish. So instead I measure out perpendiculars (with compass and trammel) and join with a straightedge.
 - The brass compass is a joy to use - throw out your school compass and buy a good one!
 - Home made trammel (on the right) with a pencil, rubber band, a piece of WRC and a copper nail.


A piece of 8' x 4' with some home made 'drafting ducks', each made from a hardwood block (ex-house rafters) smoothed down with electric plane, and a copper nail.
Lathe made from 3mm silver ash cut on the venerable Australian 'Triton' workbench.

Sunday, 31 May 2015

Completion and 'sea trials'

Well, it's been a while since I posted on this blog, but I am happy to say I am now enjoying my little boat.
I finished painting the rowing version of the boat between Christmas and New Year, and we took it down to Picnic Point boat ramp for 'sea trials'. I must have done something right, for she didn't sink (or even leak) and proved quite light and responsive on the water. It holds two adults and a child!
But it would row better with a keel!


Given that fortuitous event (returning us all to dry land) I then proceeded to fashion the sailing version:
- added a cherry wood keel
- dagger board box
 - Meranti mast (fashioned from three planks epoxied together)
- sails (fashioned from $15 blue tarp and $30 of #M double sided tape)
- spar and boom (I cheated here and simply bought 1/2" Tassie Oak dowelling
- plywood rudder and cherry wood tiller


Mast made of three pieces of Meranti epoxied together, then cut and shaped.
Note- use good quality greaseproof/baking paper - the epoxy leaks through the cheap stuff!


Gluing up the daggerboard 'casing' -
Note - when sitting in the boat, water *under pressure* will find every little crack, crevice and unfilled drill hole - tres embarrassing!


Rounding over the cherrywood tiller - that is a beltsander medium grit belt cut open and screwed between pieces of wood for handles. Works a treat - makes a hell of a mess - do outdoors!


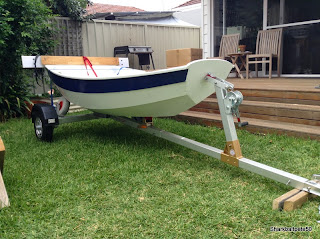
Dinghy now with keel, daggerboard and rudder added. I later cut the tiller back about a foot - it was much too long! (and that's my woodworking shed in the background, a proud addition to the small garden in between my last two jobs)


The mast was cut and shaped the same way, and is easily stepped into a base block screwed onto the floor underneath the front seat.

 The holes for the mast through the seat and into the base block are slightly elliptical, and heavily beveled to mate with the tapered and canted mast. Little finesse here, just rough marking by eye, and lots of work with files!!
I made a rough template from plywood to size the base block, but as the dinghy itself is full of weird rounded cambers and not symmetrical anyway, I finished the block with iterative hand planing.


After getting $500-$1000 prices for custom sails, I found 'Polytarp.com' on the internet and spent:
   tarp $15
   3M outdoor double sided tape $35
   4mm dacron rope $5
   stitching NIL!!

This sail has withstood 35knot winds (with a capsize) - that adhesive tape is good.


I also purchased a small trailer (from Mangrove Jack in WA), because putting the dinghy up onto the Kia roof without a proper roof rack wasn't that much fun.


First attempts at rigging before further 'sea trials'
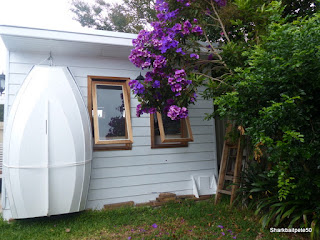
 Long term storage for a dinghy this light is as simple as installing a few eyebolts, a pulley, and lashing it to the shed.


Letting everything dry out after a sail, and a wash under the hose. I know its been a good day when the yard looks like this!

Sunday, 10 May 2015

Rowing and sailing

Well, I've now been rowing and sailing this little boat for a few months (when the weather is good)


Rowing at Oatley Bay in Sydney. Nice little boatramp and beach.

 There's plenty of boats moored in the river, so plenty of incentive to learn how to tack!

As I'm really learning how to sail in this little boat, I bought myself a Garmin Vivoactive sportswatch with the tracking GPS in mind. There is no setting for sailing/rowing, but I just set it to 'walking' so it tracks and then go out.

I also tried making a new sail (sprit sail) with the idea being that a sprit sail, additional bowsprit and job sail would allow me more control and better sailing close into the wind.

Unfortunately, my first attempt with just a loose-footed (boomless) sprit sail was less than awesome....I just drifted around....so it was back on with the lug sail, and an instant smile on my face as the boat took off across the bay!

Below is 40 odd minutes of sailing in Oatley Bay from yesterday, with a fairly constant and strong breeze. Tacking into the wind (from S-SW) on the way out, then plain sailing with the wind behind me on the way back. there must be a bit of offset with the app mapping, as I certainly didn't run aground that often!


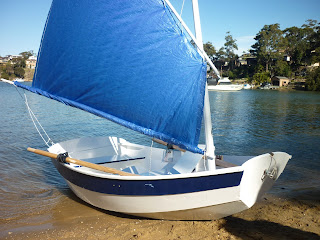
Below is my boat beached again - I've used double sided tape to fix two 10litre plastic petrol containers (from Mitre10) to the underside of the middle seat, in the hope that the boat can be bailed out next time I capsize it!!
 (The yellow box is a water proof safe, lashed to the front seat, for my iphone and carkeys - it paid for itself within 24 hours during my first capsize here a few weeks ago!)


My method now is to mount the amst and sail (bom lashed up), push off and row far enough from shore to put in the dagger board (custom made 300mm longer than the original), and rudder, stow and tie the oars as shown, then drop the boom and start sailing. If I hit a lack of wind, I just lash up the boom again, loosely lash the tiller, drop out the oars and get going! It is surprisingly good for rowing.


Back down to Oatley Bay on the Queens Birthday weekend, and the conditions were very gusty.
I managed to short-sheet the sail, and was able to potter around the Bay happily without capsizing!


Sunday, 28 December 2014

Knees, knuckles and bums...

 The hull after I had lifted it off the formers and ladder.


Because the brass screws exited the transom, I used an angle grinder to grind them flat on the inside and on the outside


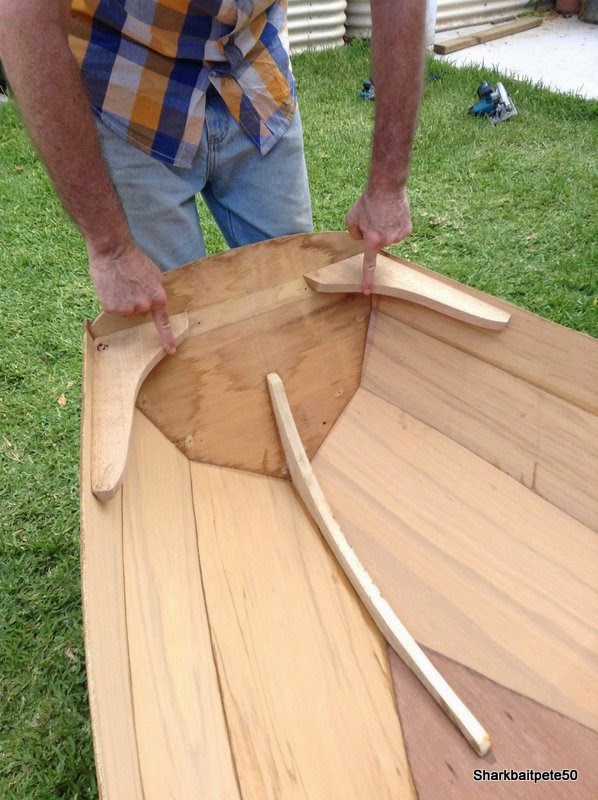
to measure up the 'knees' for the corners, I started with pieces of 19mm DAR "Tasmanian Oak", and used a crude offset pencil to rough out the angle between the bow and the sides.


After cutting bevels for the two sides in contact with the boat, I had a piece that fitted.


I marked out the "knees" from measurements on the plans, drew a freehand curve, then cut with a jigsaw. These came up better than I expected.


Preparation for painting consisted of sanding back some of the worst overspills of epoxy...in hindsight, I should have taken the sanding of the spilled epoxy further, to ensure a good paint finish. (The orbital sander seemed to have the remarkable property of grinding off the epoxy before chewing through the plywood - perhaps because the epoxy is so rigid?)
 I used a belt sander on the bigger dribbles of epoxy - no finesse there - epoxy and plywood are ground to dust equally!

Paint hides faults very poorly!


Monday, 27 October 2014

Planking, bevelling and screwing


Late Oct:  well, after a layoff period to recover from a back sprain (blunt planes and lower back injuries do not mix) I purchased myself a cordless electric plane and I'm back to planking.


- better to use as few screws as possible to hold it together in the dry fit - after all, it is the epoxy that will be holding it together not the screws
- i bought brass screws, but silicon bronze screws would have been much cooler, especially since you don't need so many anyway (or at least, I don't think you do - I don't actually know where all those hundreds of screws are meant to go without the book!)

-
Don't add a dozen screws like I did!
the bevelling is reasonably important to ensure the planks sit nicely against each other, dont be in too much of a hurry with the plane - I've been planing off fractions of a mm, then checking to see how it looks.


The bevel angle will allow the next plank to sit ~ flush. Epoxy will make up the difference.

First off I would say I've learnt a few things in the last few weeks:
- the accuracy of the laminated rib and temporary plywood moulds is really important
- the planks are shaped assuming the moulds are accurate, so lay them against the drawings, and trim and/or add until they ARE accurate
- I pulled my dry fit planking apart, pulled off the moulds, and started trimming once I saw where being sloppy was going to lead me
I'm going to have a lot of screw holes to putty up when I finish!


holding down roughly with clamps, tapping into place then using a countersink bit, an 8G by 25mm brass screw and an impact driver seemed to work pretty well, even without any help!

While recuperating, I made some short 'saw horses' - I would be ashamed to admit it took me three goes to get this right on any other forum!


Showing the shape of the 'boat' with the three planks fitted on one side.

Showing the fit of the planks to the laminated rib, on the inside, once I had spent 2-3 hours pulling it all apart and planing the rib down to proper, accurate size (actually it is only accurate on the outside, it is actually more skinny than the original, but the inside curve doesn't matter.