I finished painting the rowing version of the boat between Christmas and New Year, and we took it down to Picnic Point boat ramp for 'sea trials'. I must have done something right, for she didn't sink (or even leak) and proved quite light and responsive on the water. It holds two adults and a child!
But it would row better with a keel!
Given that fortuitous event (returning us all to dry land) I then proceeded to fashion the sailing version:
- added a cherry wood keel
- dagger board box
- Meranti mast (fashioned from three planks epoxied together)
- sails (fashioned from $15 blue tarp and $30 of #M double sided tape)
- spar and boom (I cheated here and simply bought 1/2" Tassie Oak dowelling
- plywood rudder and cherry wood tiller
Mast made of three pieces of Meranti epoxied together, then cut and shaped.
Note- use good quality greaseproof/baking paper - the epoxy leaks through the cheap stuff!
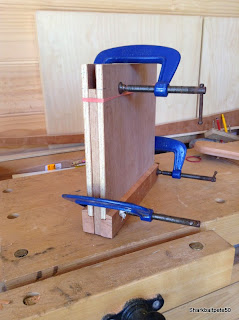
Gluing up the daggerboard 'casing' -
Note - when sitting in the boat, water *under pressure* will find every little crack, crevice and unfilled drill hole - tres embarrassing!
Rounding over the cherrywood tiller - that is a beltsander medium grit belt cut open and screwed between pieces of wood for handles. Works a treat - makes a hell of a mess - do outdoors!
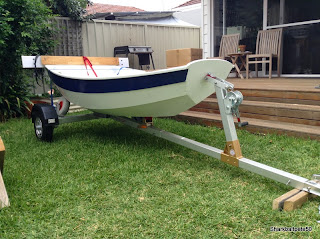
Dinghy now with keel, daggerboard and rudder added. I later cut the tiller back about a foot - it was much too long! (and that's my woodworking shed in the background, a proud addition to the small garden in between my last two jobs)
The mast was cut and shaped the same way, and is easily stepped into a base block screwed onto the floor underneath the front seat.
The holes for the mast through the seat and into the base block are slightly elliptical, and heavily beveled to mate with the tapered and canted mast. Little finesse here, just rough marking by eye, and lots of work with files!!
I made a rough template from plywood to size the base block, but as the dinghy itself is full of weird rounded cambers and not symmetrical anyway, I finished the block with iterative hand planing.
After getting $500-$1000 prices for custom sails, I found 'Polytarp.com' on the internet and spent:
tarp $15
3M outdoor double sided tape $35
4mm dacron rope $5
stitching NIL!!
This sail has withstood 35knot winds (with a capsize) - that adhesive tape is good.
I also purchased a small trailer (from Mangrove Jack in WA), because putting the dinghy up onto the Kia roof without a proper roof rack wasn't that much fun.
First attempts at rigging before further 'sea trials'
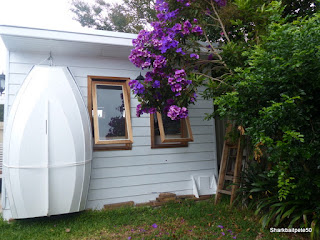
Long term storage for a dinghy this light is as simple as installing a few eyebolts, a pulley, and lashing it to the shed.
Letting everything dry out after a sail, and a wash under the hose. I know its been a good day when the yard looks like this!


No comments:
Post a Comment